Using Copper Molds to Make Garden Stones
Hey, there, it’s Sarah of Sadie Seasongoods again, with a new upcycling idea to share with you.
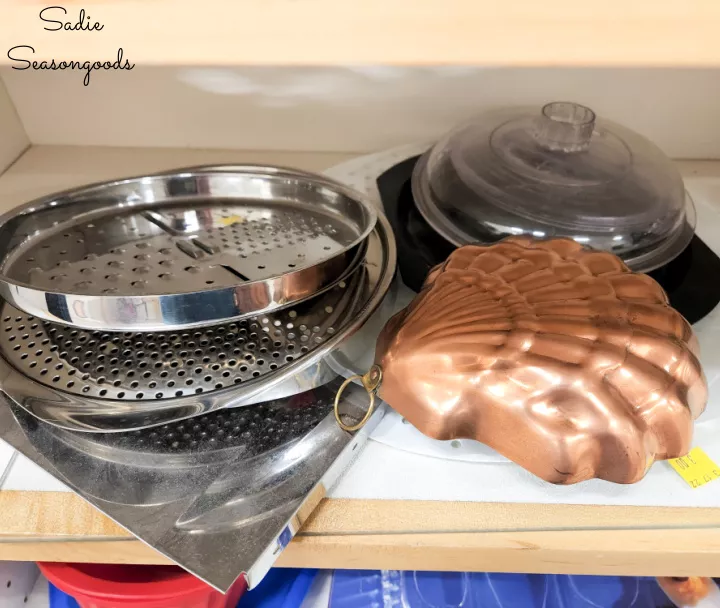
Summertime is a great time to create projects for your yard and garden- especially when the kids are out of school. So, I thought it would be fun to show you how easy it is to make some garden stones using copper molds from one of our ReStores! Besides, half the fun is hunting for decorative pans/molds that fit your style and personality- time to go thrifting at the Charlotte Region ReStores!
Here’s what you’ll need:
- Copper molds or decorative cake pans from the Charlotte Region ReStores
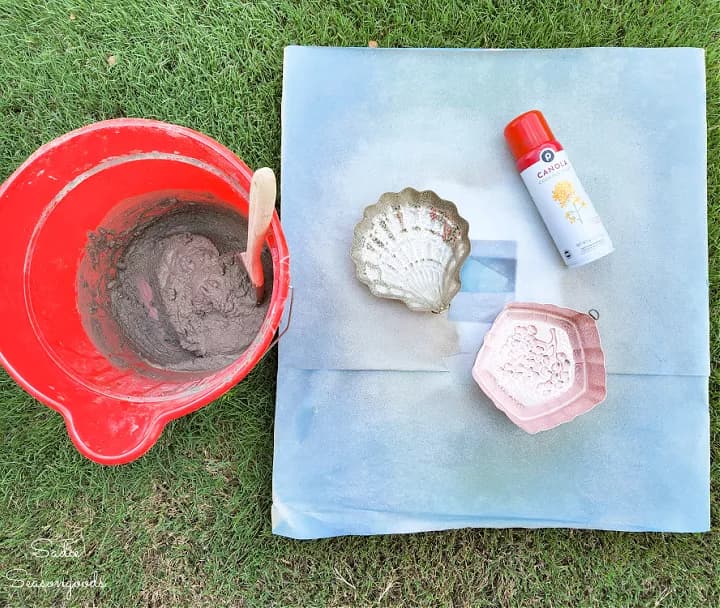
- Craft cement/stepping stone mix (from a craft store)
- Cooking spray
- Bucket and wooden spoon (You may be able to find these at our ReStores, too!)
- Spray paint and/or craft paint and brushes
- Waterproof topcoat (spray or brush-on)
Here’s how I made these fun garden stones:
- Head to any of our ReStore locations and look in the pots/pans area for decorative cake pans or vintage copper molds.
- Follow the directions on your package of stepping stone mix in order to use the correct cement-to-water ratio. Stir up the mix and spray the insides of your pans/molds with cooking spray-make sure to get into all the nooks and crannies!
- My box of stepping stone mix was eight pounds. I used approximately half the mix and half the recommended amount of water, and it was nearly the perfect amount for two small copper pans.
- Pour the wet concrete into your pans and tap them down on a flat surface to ensure the mix goes into all of the crevices (just like you would a cake pan full of batter). Use the stirring spoon to smooth down the top of the concrete (i.e., which will become the bottom of the stone later on).
- After the allotted cure time (mine was 24 hours), carefully turn your pans/molds over in your hands. Your stones should come out right away (that’s the secret behind the cooking spray)!
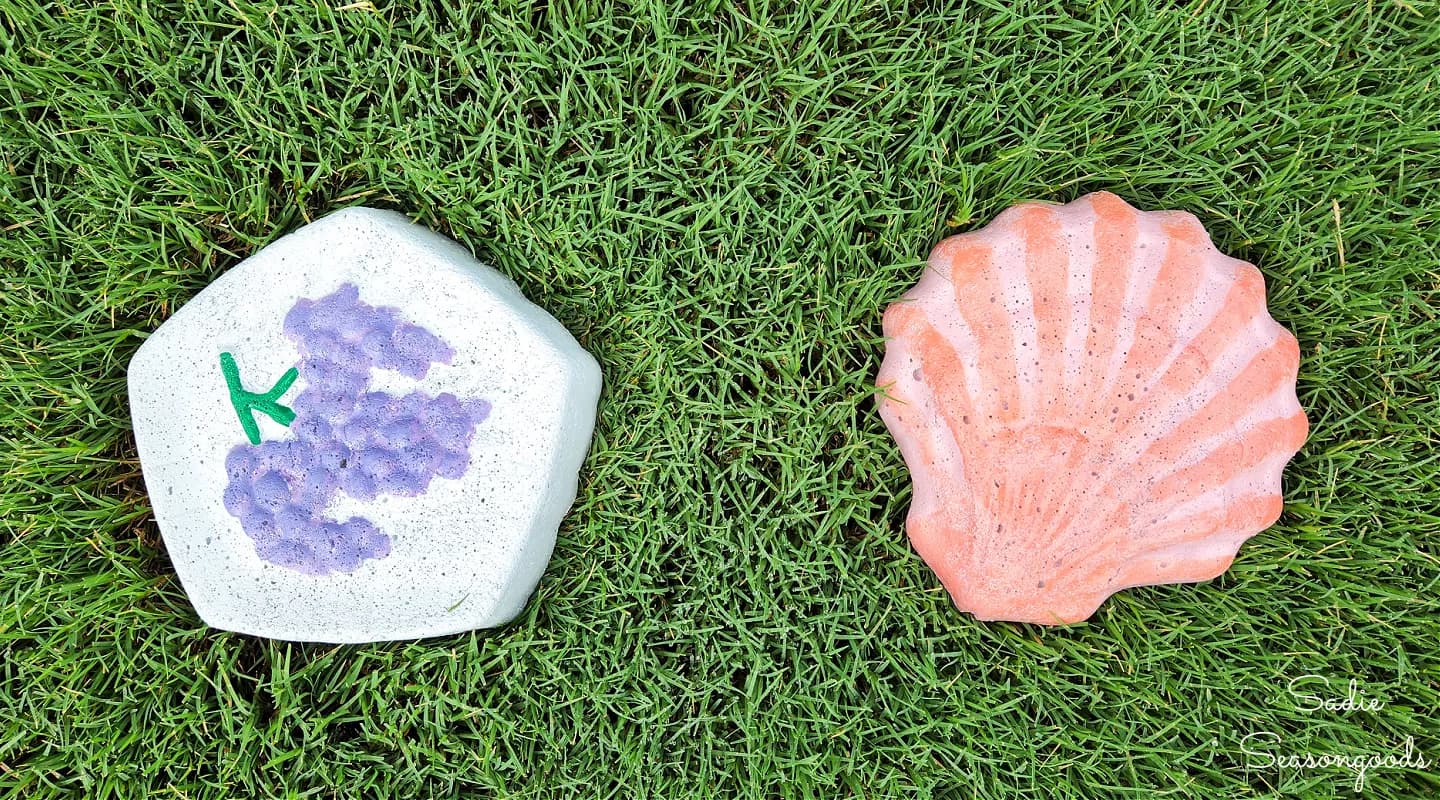
- Use a paint brush to remove excess dust from the tops/sides of your stones before painting! I like to spray paint a base color on my garden stones first.
- Once you’re done painting your stones, use a good quality waterproof topcoat on all sides of your stones before placing outside!
Decorate Your Yard & Garden!
Isn’t that a wonderfully fun project? I just love how quirky you can get with these garden stones, depending on the pans and molds you find! And with stepping stone mixes, making concrete crafts has never been easier! We’d love to see your garden stone projects that started at one of our ReStores. Please tag us (@cltregionrestore and @sadieseasongoods) with the hashtag #ReStoreGardenStones to show off your projects!